Forno Classico 100 (Click on Images to Enlarge)
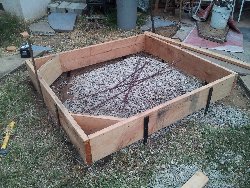
| Once we got the location figured out, we figured out the height for the base. This looks very tall here but there is a reason for our madness. Eventually we plan on raising the patio floor 9" to help with flooding issues that we currently have every time it rains. Here is the base with some gravel in to avoid pouring enough concrete to build Hoover dam and the rebar is not placed, don't worry the rebar here was just laying there. The rebar went along the edges and we placed a wire mesh near the top. |
 |
| Bad picture I know...So here is the base. We put the rebar in so that the concrete cinder blocks will be held in. The plan is to just stack the block and then fill all the holes unlike my last oven were I spent a lot of time mortaring each block. This looks very tall but remember eventually the patio floor will be raised to about 1" below this base. I also did the back 2 corners with a 45degree to minimize toe breaking corners in the back yard. |
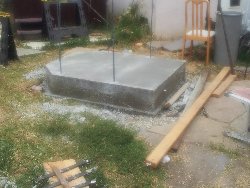 |
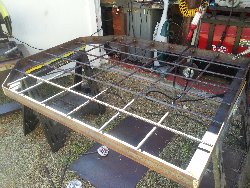
| The beginings of the base support slab. There are many choices here, most build a 5-6" inch thick support slab, remeber that this slab will have to support the weight of the oven. I want to be able to move this in the future if needed, I seriously doubt I ever will and I hope never to move it but I decided to build a metal frame, this way if I ever needed to move the oven I could hire a forklift, cut a few pieces of rebar that hold this base to the walls and lift it. A 6" thick slab would more than double the weight so I did this. At this point, you can see 2.5" x .250 thick angle iron with .5" rebar on 8" center welded to the frame. |
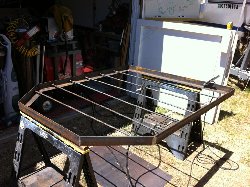 |
| Now the cross bars are welded to the angle iron, unlike my old oven where I welded the rebar before finding out that its not a good idea, this time I will tie the rebar properly. Again, the 45degree corners are just so I don't break my toes walking around the yard, that is the back of the oven which is round. |
 |
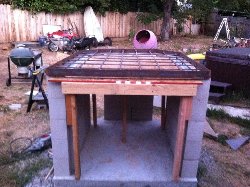
| The cinder blocks are just stacked and then all the holes filed with rebar and concrete. The support base is now on the bricks and next step will be to pour this part. The concrete brick walls will be stucco'd to match the house. |
 |
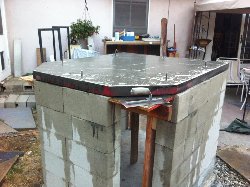
This looks wetter then it really is. The support slab was poured with "Maximizer" Concrete bags, its 5500PSI bags. Trying to add some strength and the rebar pieces sticking up are to hold the next step which is 4" of Vermicrete insulation, then the oven :) |
 |
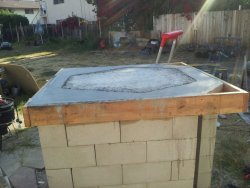
| I was going to make a round form to match the oven but that quickly turned into work, so I made a form that would allow the entire cooking floor to be on top of the vermicrete and yet have the majority of the oven weight on solid concrete. The vermicrete is just vermiculite/perlite, cement and some sand. You mix it by hand so as to not break up the vermiculite/perlite. Use the largest perlite you can find, I thinks its #3 but all my vermucilite was left over from my old Mugnaini and purchased 12+ years ago so I don't remember the details. |
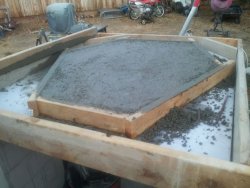 |
| Now you can see the concrete part that will hold the weight of the oven, I was concerned the vermicrete could not hold the weight and did this extra step. I now think it was a waste of time and effort but I like it as it will give me something solid to put the tile onto. The front of the oven is to the left, the 2 back corners are 45'd so as to minimize intrusion into the back yard (I call it minimize the toe breaking corners) |
 |
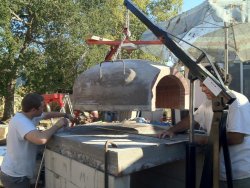
| After placing the cooking floor down, EXACTLY or you will do this more than once but by the 3rd try, it will be right (trust me, I know). Its time to lower the oven onto its final location. Next will be to cut off the handles and stucco the oven and make pizza. |
 |
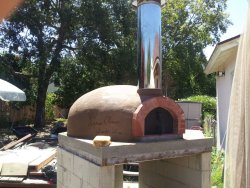
| I went with a double wall stainless chimney, it was very expensive but I like it. I know Guiseppe at Forno Classico says it was a waste of money and all that is need is single wall and not even stainless but I remember reading somewhere that double walls draw better because they don't cool down as much and it worked well on my Mugnaini so I went with it. Now you can see the finished oven, I had Guiseppe come and do the stucco outside work. Next will be to make "wings" off each side for a prep area and BBQ but for now, its Pizza time. |
 |
